Adding Contacts
Learn how to add contacts individually or import them in bulk to start building your outreach pipeline.
Before you can send outreach emails, you need contacts. Repliably makes it easy to add them one at a time or import them in bulk from a CSV file.
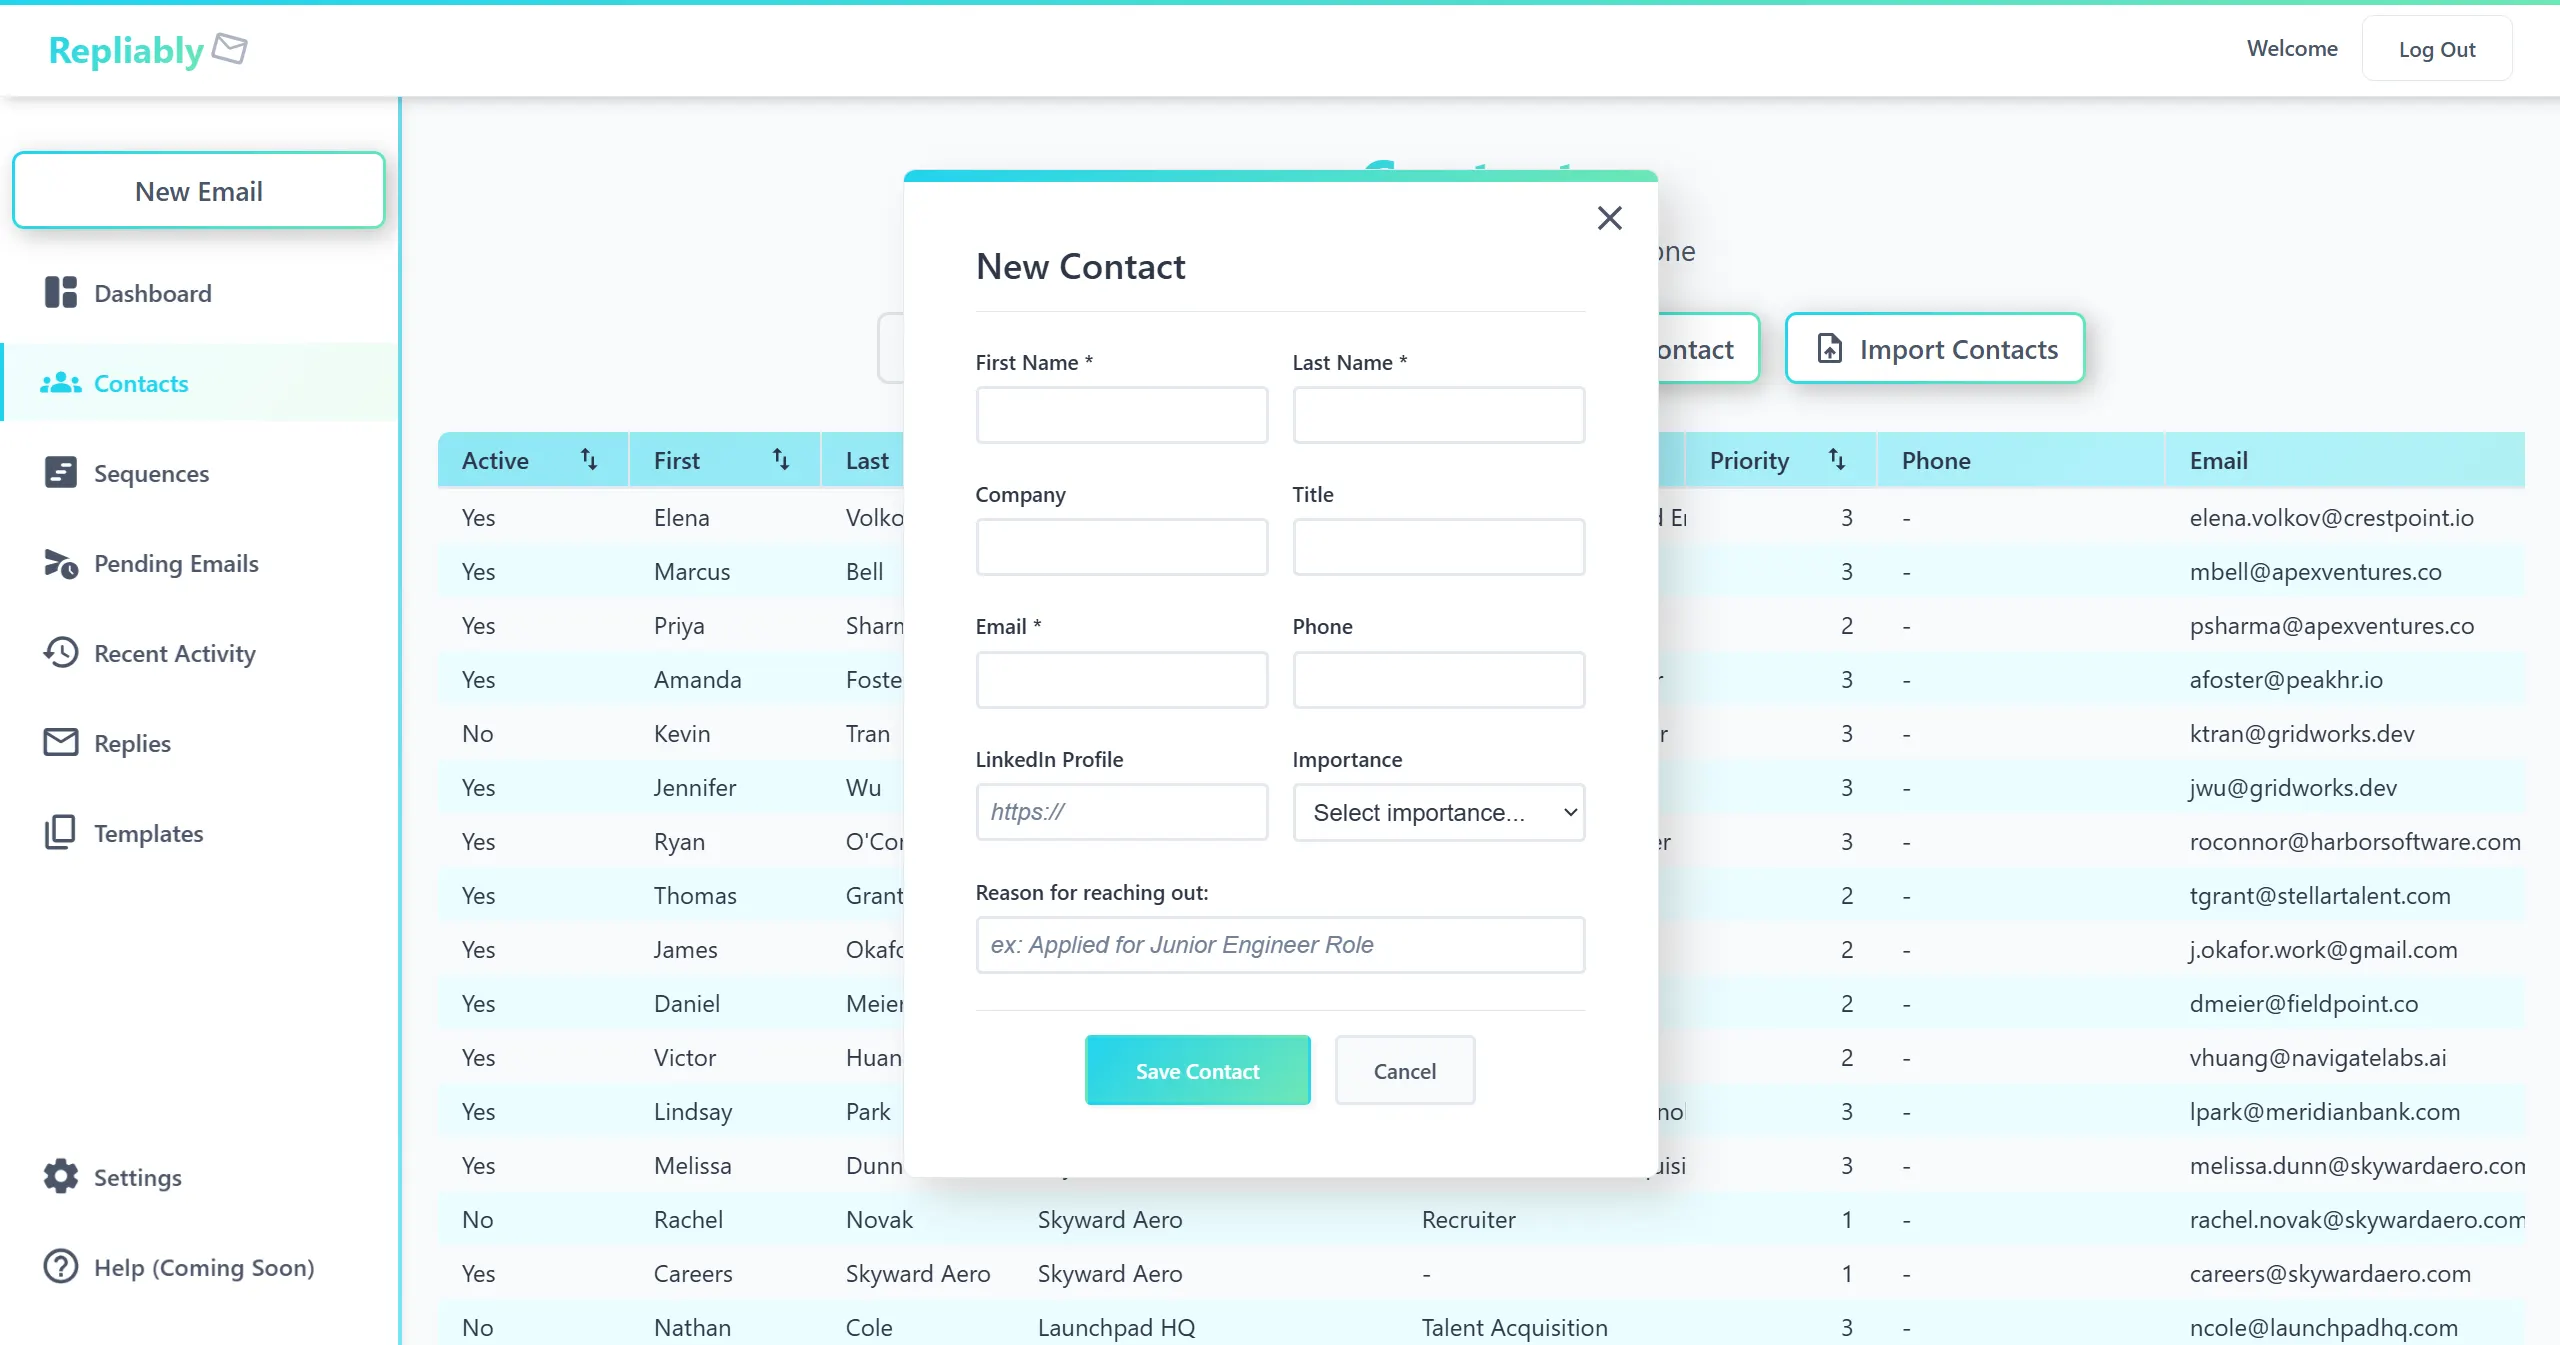
Adding a Single Contact
To add a contact manually:
- Navigate to the Contacts page from the sidebar.
- Click the "Add Contact" button.
- Fill in the contact's name, email address, and any optional fields (company, title, etc.).
- Click "Save" to add them to your contact list.
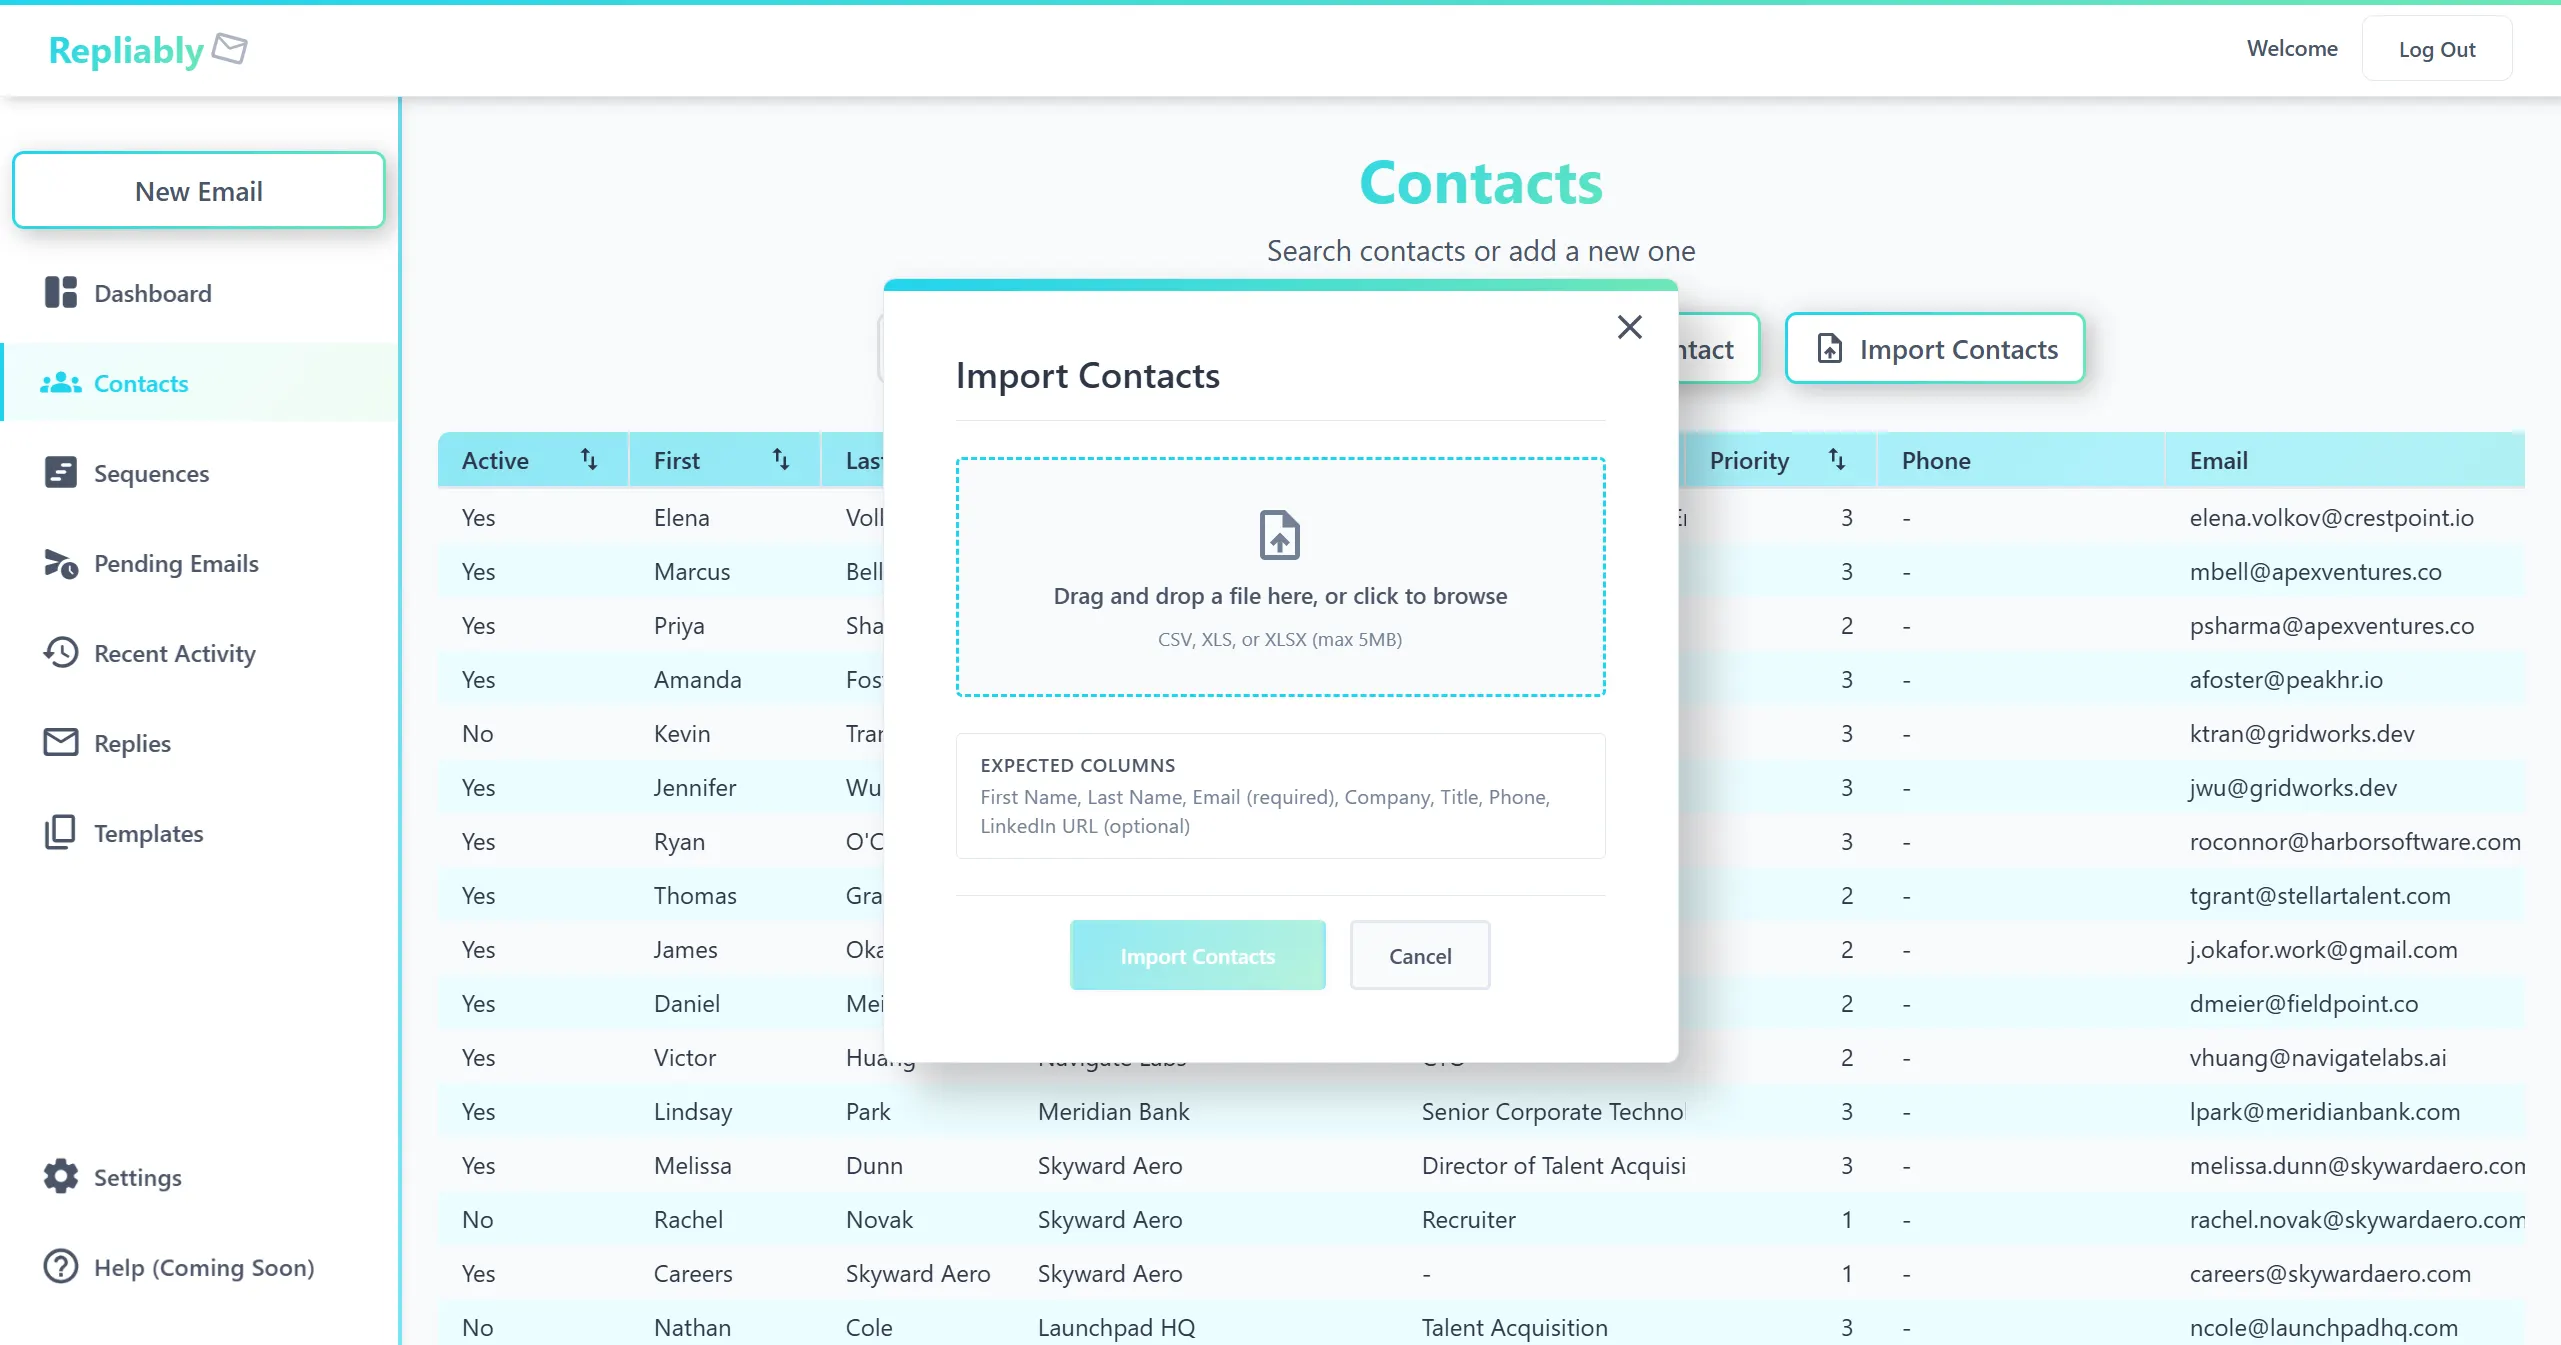
Importing Contacts in Bulk
For larger lists, you can import contacts from a CSV or Excel file. This is the fastest way to get up and running with outreach at scale. Bulk import is available on Basic and above paid plans.
- Go to the Contacts page and click "Import CSV."
- Upload a .csv file with columns for name and email (at minimum).
- Repliably will map your columns automatically. Review the mapping and adjust if needed.
- Click "Import" to add all contacts at once.
Managing Your Contacts
Once your contacts are added, you can search, sort, and filter them from the Contacts page. Use the search bar to find specific contacts, or sort by name, company, or date added.
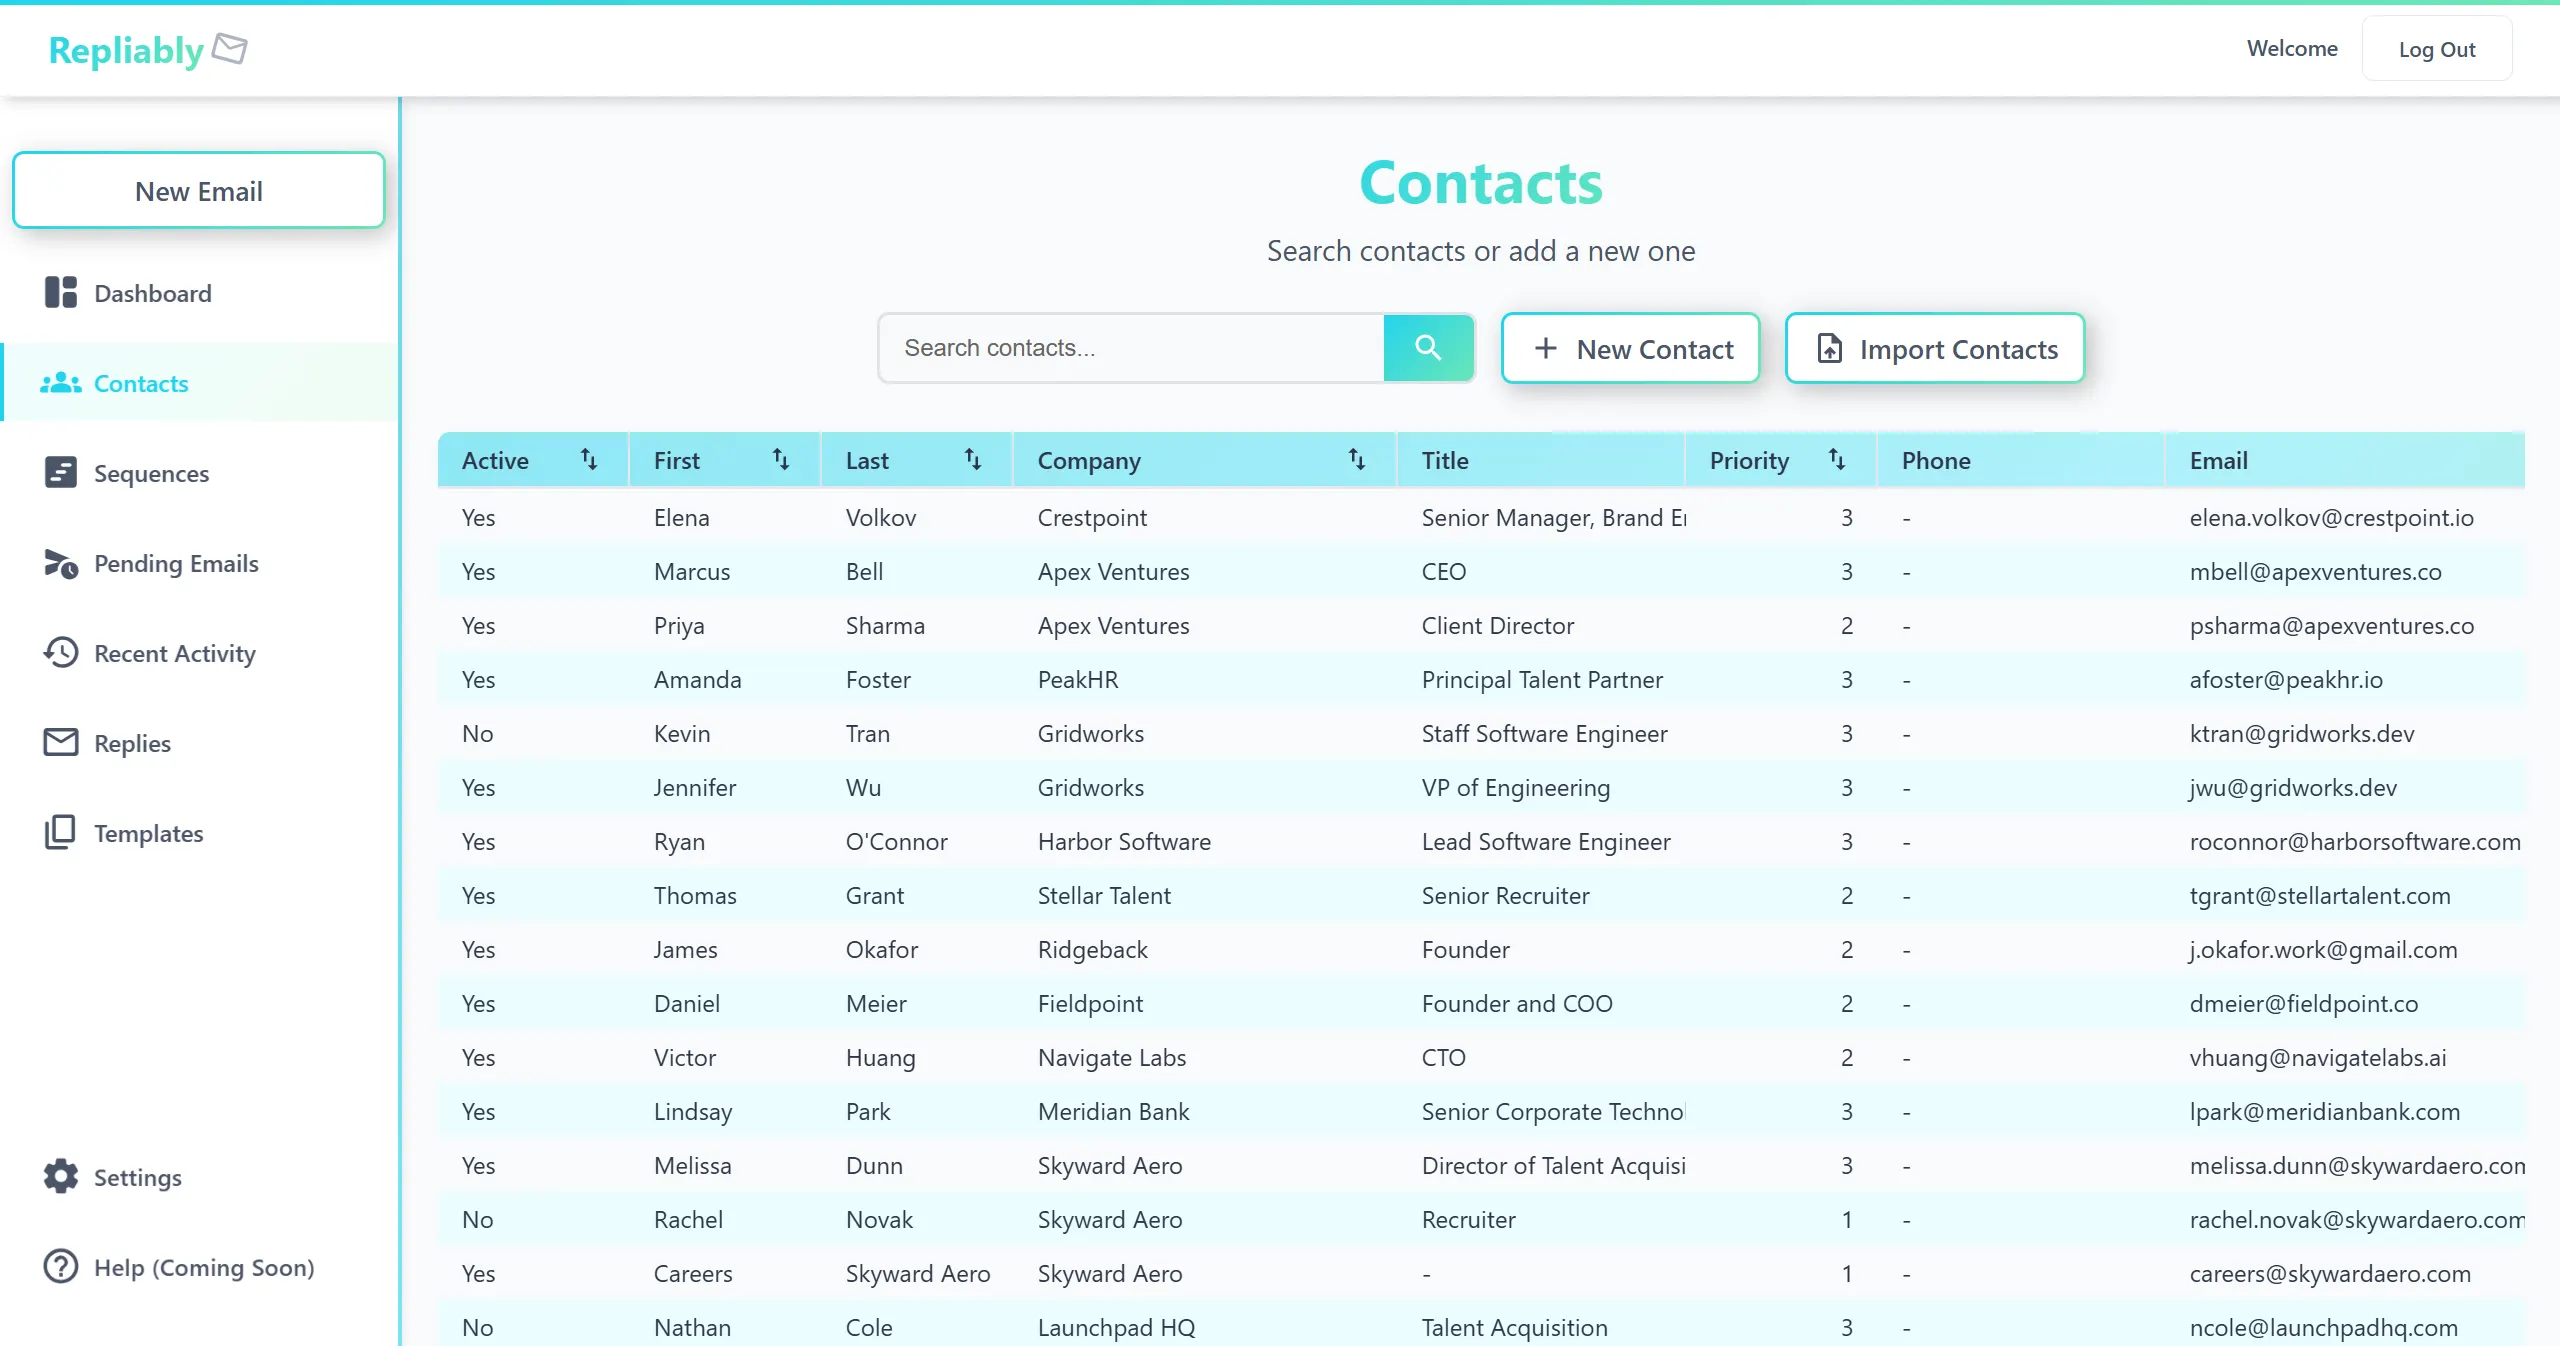
Editing and Removing Contacts
Click on any contact to view their details. From there you can edit their information or remove them from your list. Removing a contact will also cancel any pending emails in active sequences for that contact.